# Add order
This is the main screen when logging into the system and is the most important module, as from here the customer accounts are created at the tables and Bills To-go.
Another way to access the command section is by selecting the Sales tab in the main menu and the "Add Order" option in the drop-down submenu.
# Open Table
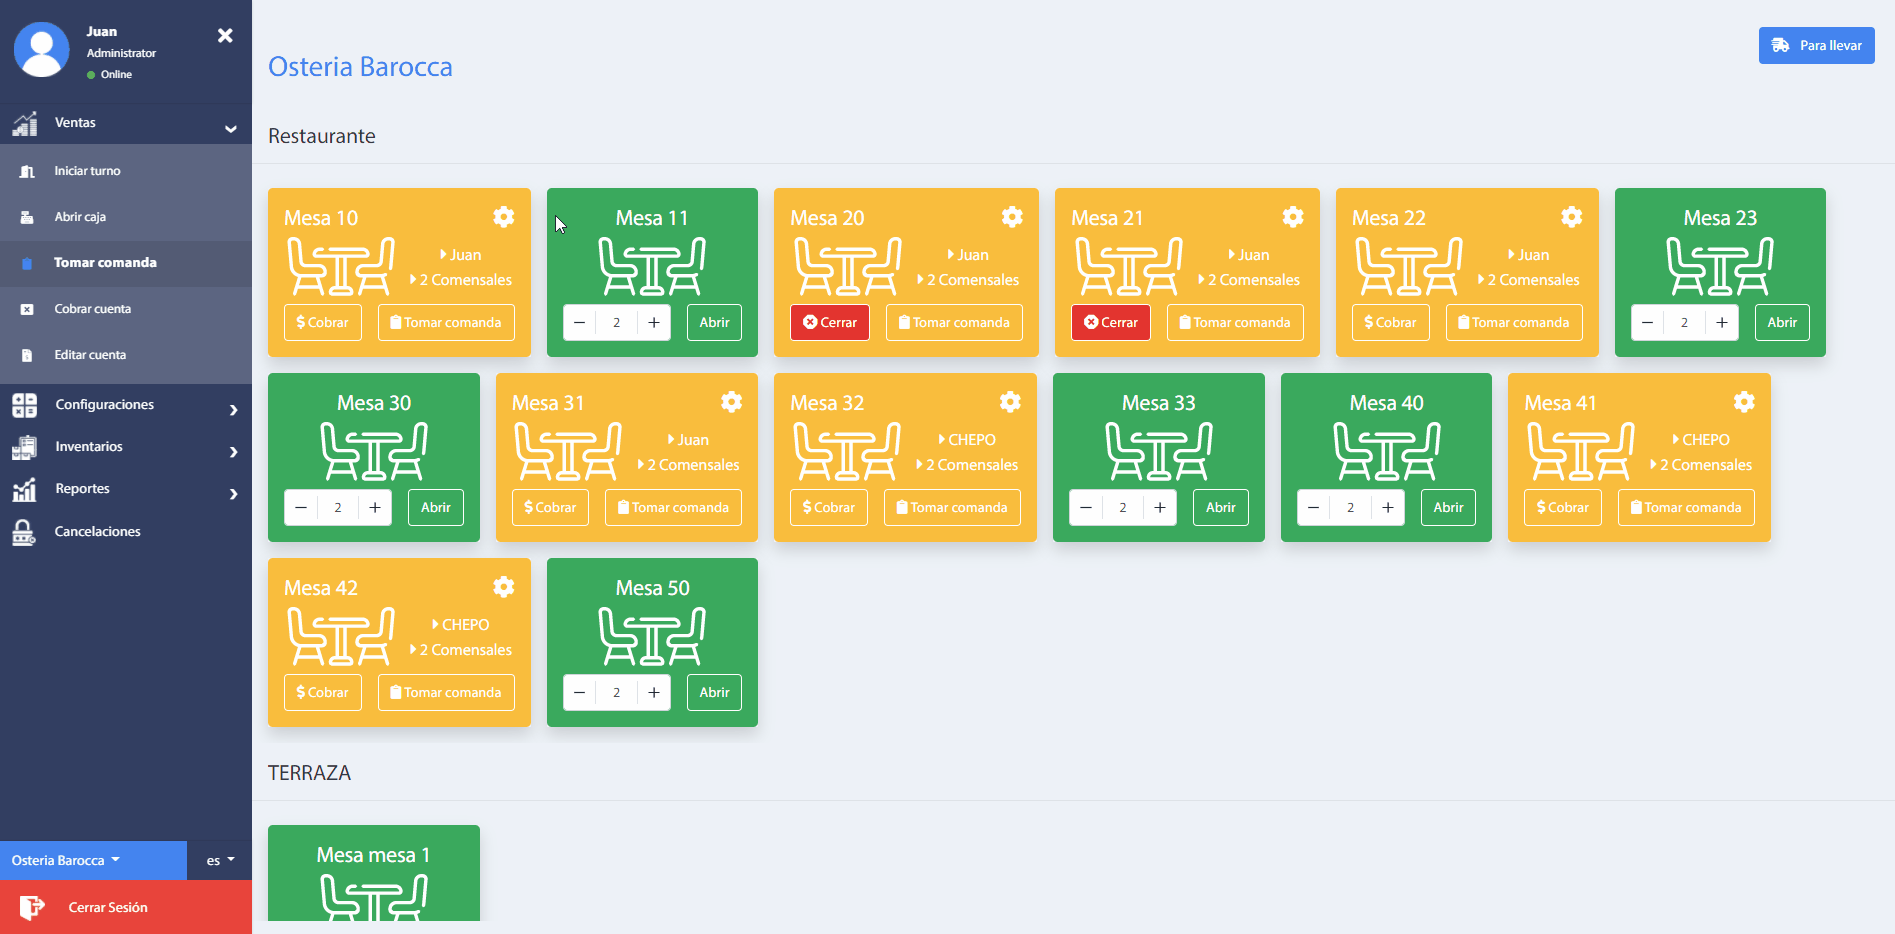
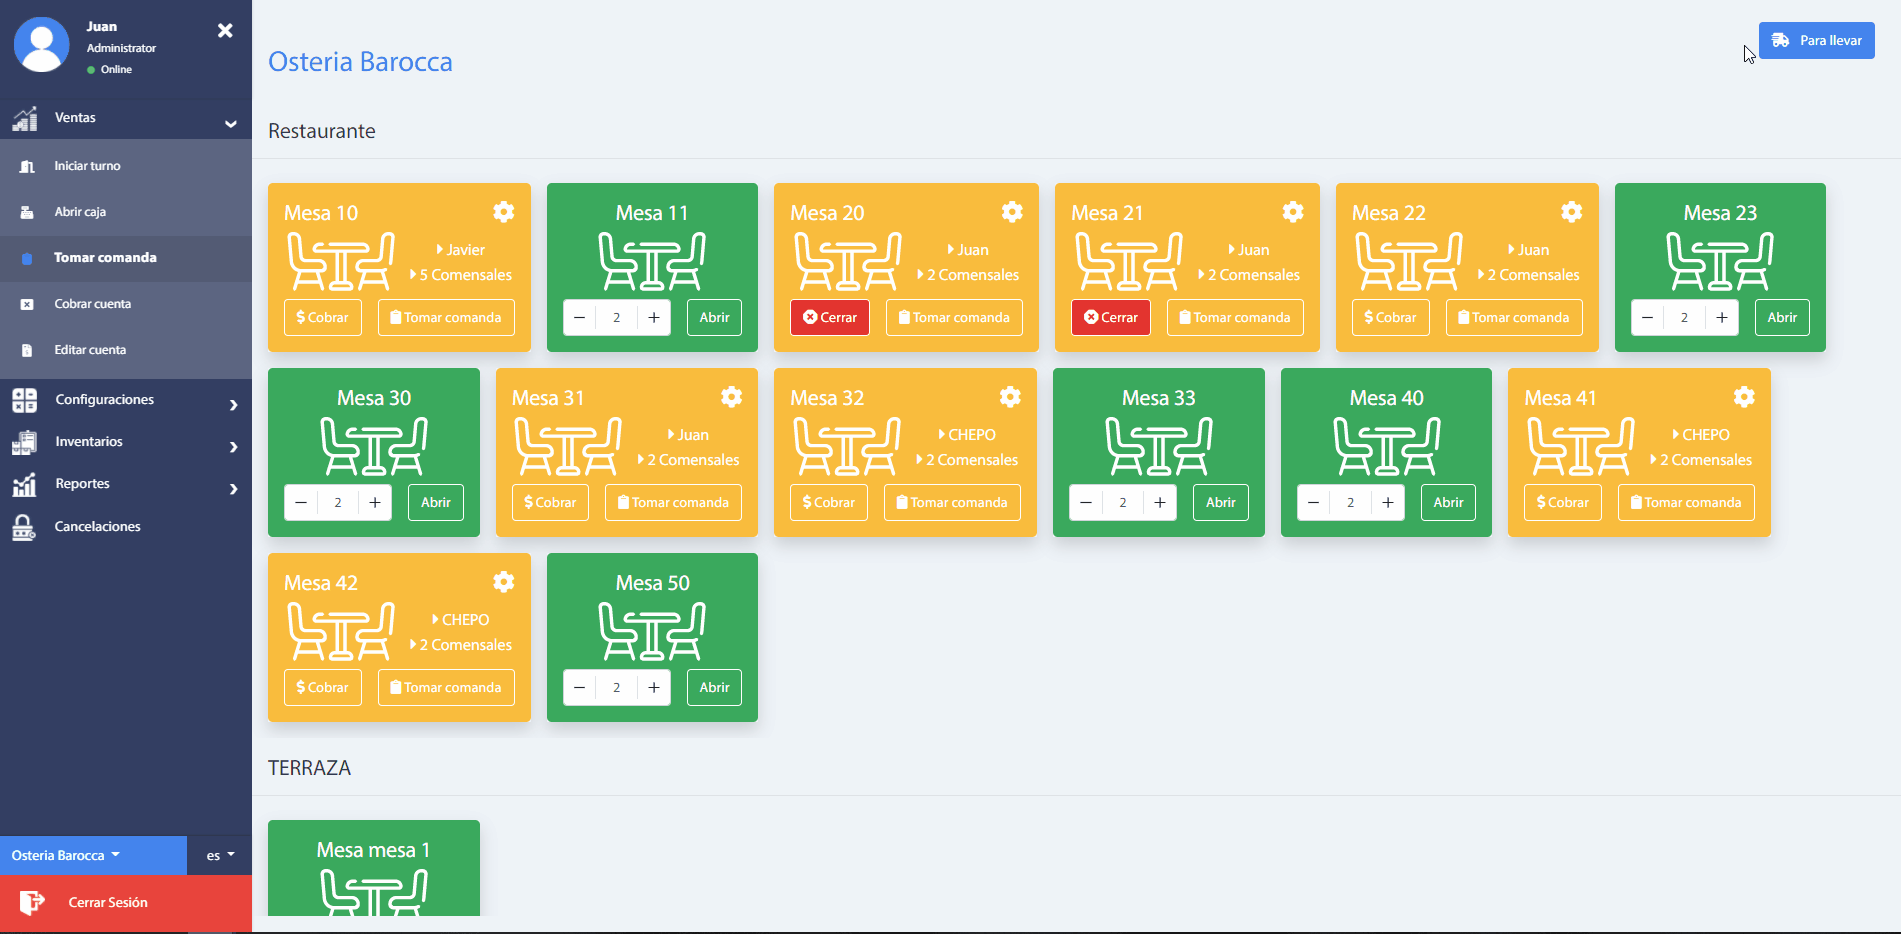
The main window shows the tables that are occupied in the center of consumption in color Orange and the tables available in color Green. An open table shows the Close button if you have no products added and the Collect option if you have products added and confirmed.
Caution
Before opening tables you must start shift and open cash desks.
To start taking orders it is necessary to open the tables as follows:
- Choose a table available in green.
- Specify the number of people who will occupy the table (By default, it is 2 per table). To change the number of diners at the table, press the up or down arrows on your keyboard; or simply click on the "+" and "-" icons.
- Finally press the Add Order button.
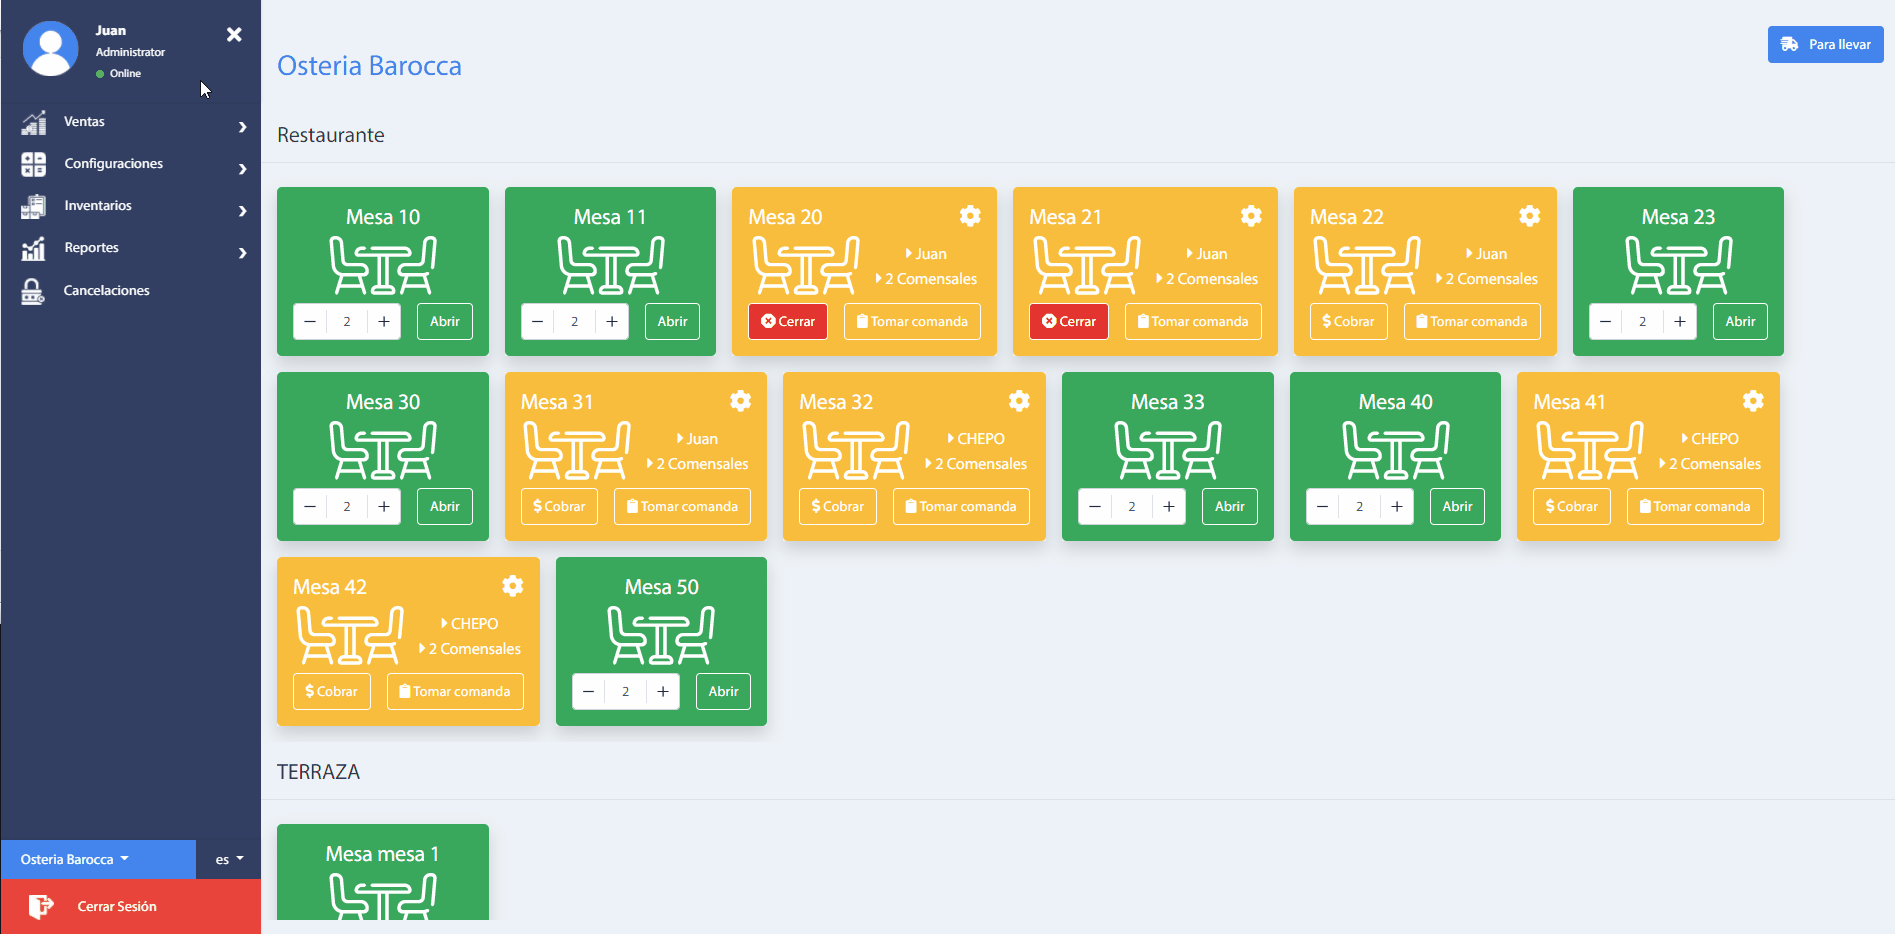
Also, it is possible to update the waiter who attends and the number of diners at an occupied table, by pressing the Setup icon, as follows
# Take Order
Once the table is opened, the system will automatically direct us to the Command section, where the products ordered by the customer will be added. By default, one account per table is created, but it is possible to add more accounts in case the guests want to make separate payments.
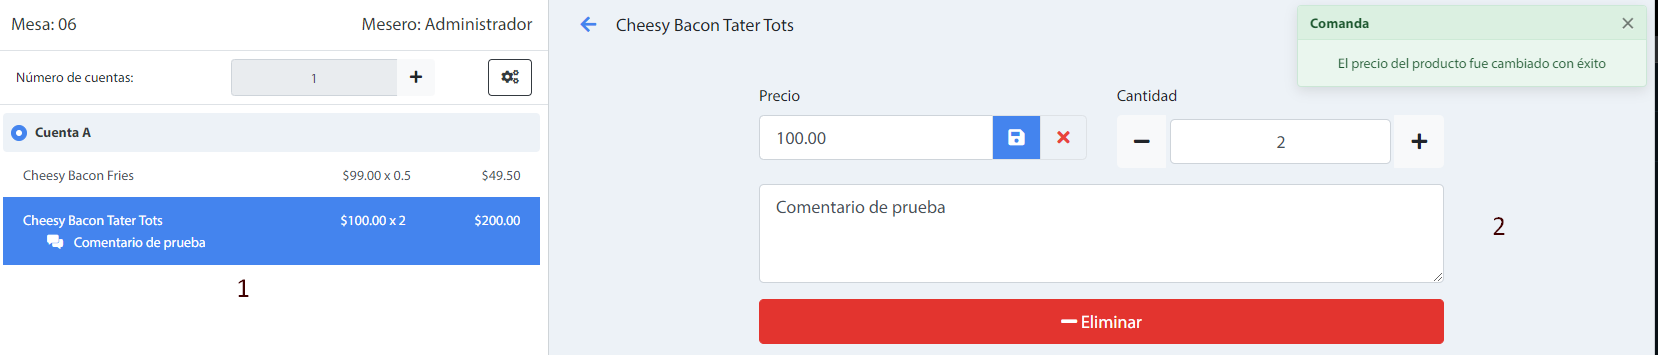
When you click on a product, you will be shown the options to add comments, update price and product quantity; and in case of cancellation the option to remove the product from the account.
Recommendation
It is necessary that the products are assigned to a preparation area and the preparation area has a printer linked to the tickets. Otherwise the following errors could appear:

# Bills To-go
Bills To-go category is used to add customer orders for products that do not require a table. As its name indicates, the order will be delivered to the client at the moment so that he can take it or it will be delivered by some distribution channel.
It is only possible to create an account to add the products and the only operation for an account is the change of the name or label.
Take-away accounts can be added by accessing the menu Sales -> Add order and finally click on the button To-Go with the icon of a truck.
The system will automatically direct you to the Take order section where you can add the products needed for the account.
Note that the process is the same as adding products to a table bill. However, it is now necessary to select a Distribution channel, where the delivery services are listed and the option Restaurant for immediate delivery.
# Table accounts
A default table has an account for the collection of the products. However, other accounts can be added to separate product orders by pressing the "+" icon.
There are different operations in the management of the accounts in a table, which appear when selecting an account and the icon of Settings, as the following image indicates:
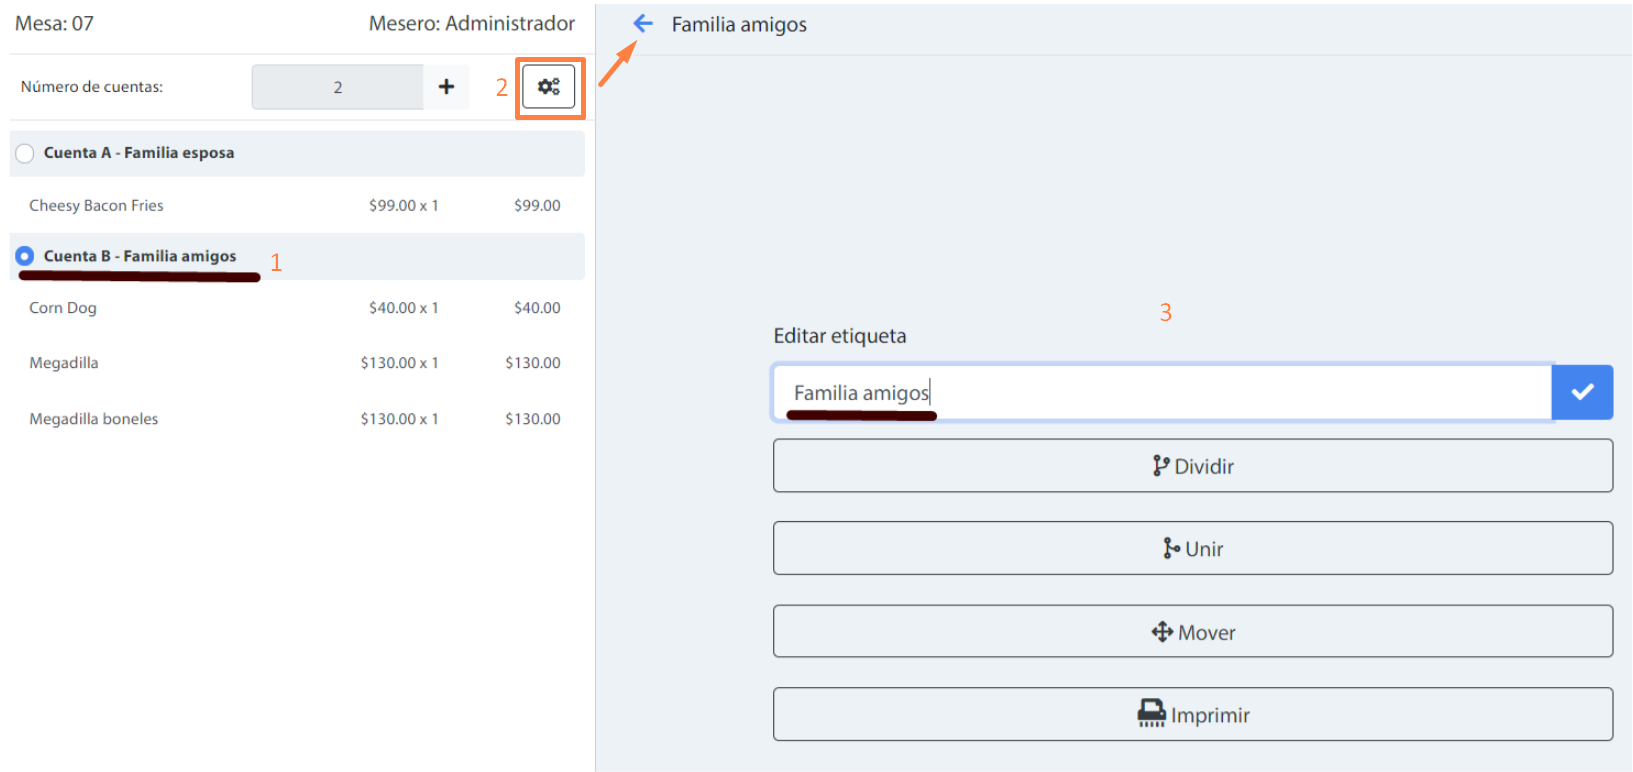
- Split: The products that exist on the account of an open table can be divided into another new account on the same table. To do this, it will be necessary to select which products will be added to the new account.

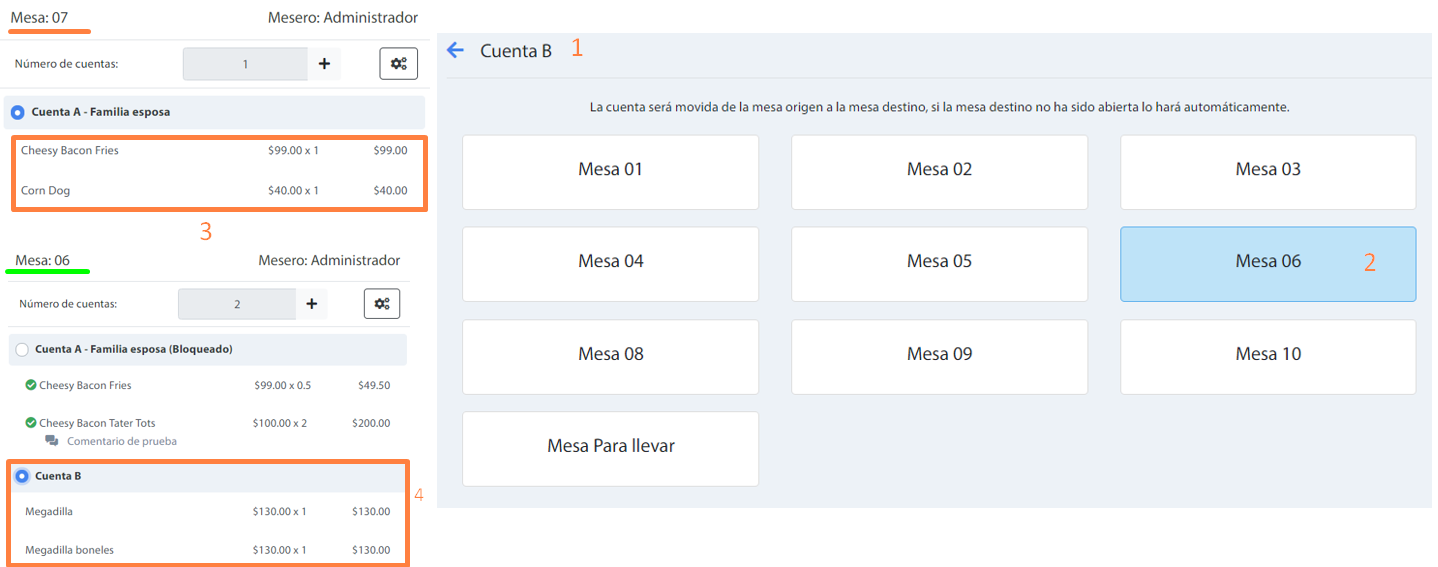
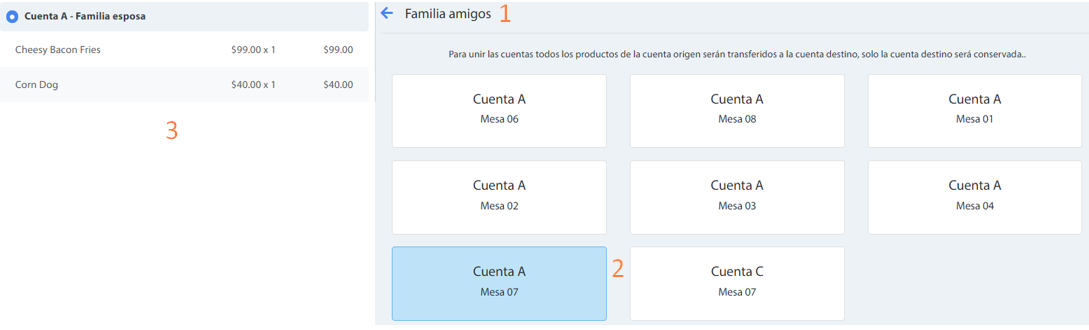
- Join: Products that exist in a source account can be added in another selected destination account. At the end of the source account is deleted. This operation can be performed from table to table and from table to Bills To-go.
- Move: The account will be moved from the source table to the destination table, if the destination table has not been opened it will be done automatically. This operation can be performed from table to table and from table to Bills To-go.